Wedoo automatic baler machine

OTHER MACHINE
Wedoo automatic baler machine
OTHER MACHINE
Specification: Work Area 500x500x500mm Pressure 100 Bar Max Hydraulic Bore 60mm Dynamo 5,5 HP 3 Phase Frame H-Beam 100 Weight Per Ball 40-70kg
Wedoo's automatic baler operates using hydraulic pressure to compress waste into a compact form, which is then tied or wrapped with twine or wire to keep it together. The machine requires minimal human intervention, reducing the risk of accidents and injuries. Using automatic baler or bottle press machines has numerous benefits, including reducing the amount of space needed to store waste materials, which is especially beneficial in areas where land is scarce. It also reduces the frequency of waste collections, which reduces the carbon footprint of waste management operations.
Browse Files
Table of Contents
Download
Required skills and tools
cut the parts
Build the main frame
Make the hinge
Build the door
IMPORTANT: Hinge and Door alignment
Build oil tank and case for the motor
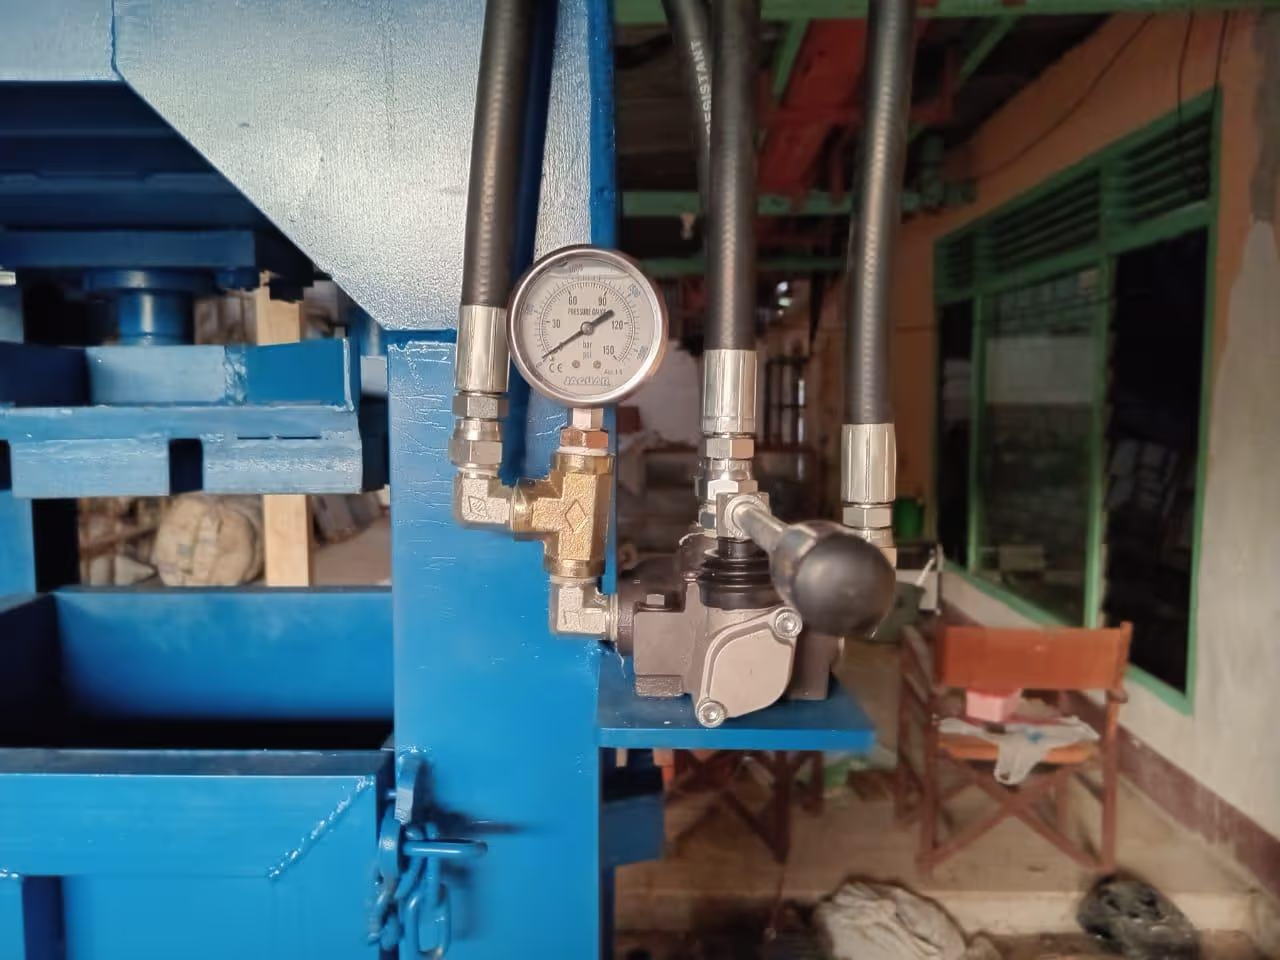
Assemble the hydraulic
Assembling the remaining component and test
Optional step: paint
Time to press!
Let us know how it goes!
Download
First off, here is your download package for this machine!
In this folder you will find:
For Autodesk inventor users, we provided: .iam = (assembly) .Idw (construction drawings) .Ipt (parts)
We also provide some in-depth pictures and videos in this link photos.app.goo.gl: photos.app.goo.gl/7ALBkSbWRh6VzzaK9
These are the required skills and machinery you or your machine builder will need to have access to these skills and tools:
⚙️ Machinery / specific tools needed:
PPE
Download the plasma cutter files and follow the instructions and cut your machine parts according to the thickness of the metal plate . You can also bring these sets of files to a local machine builder to get it cut there.
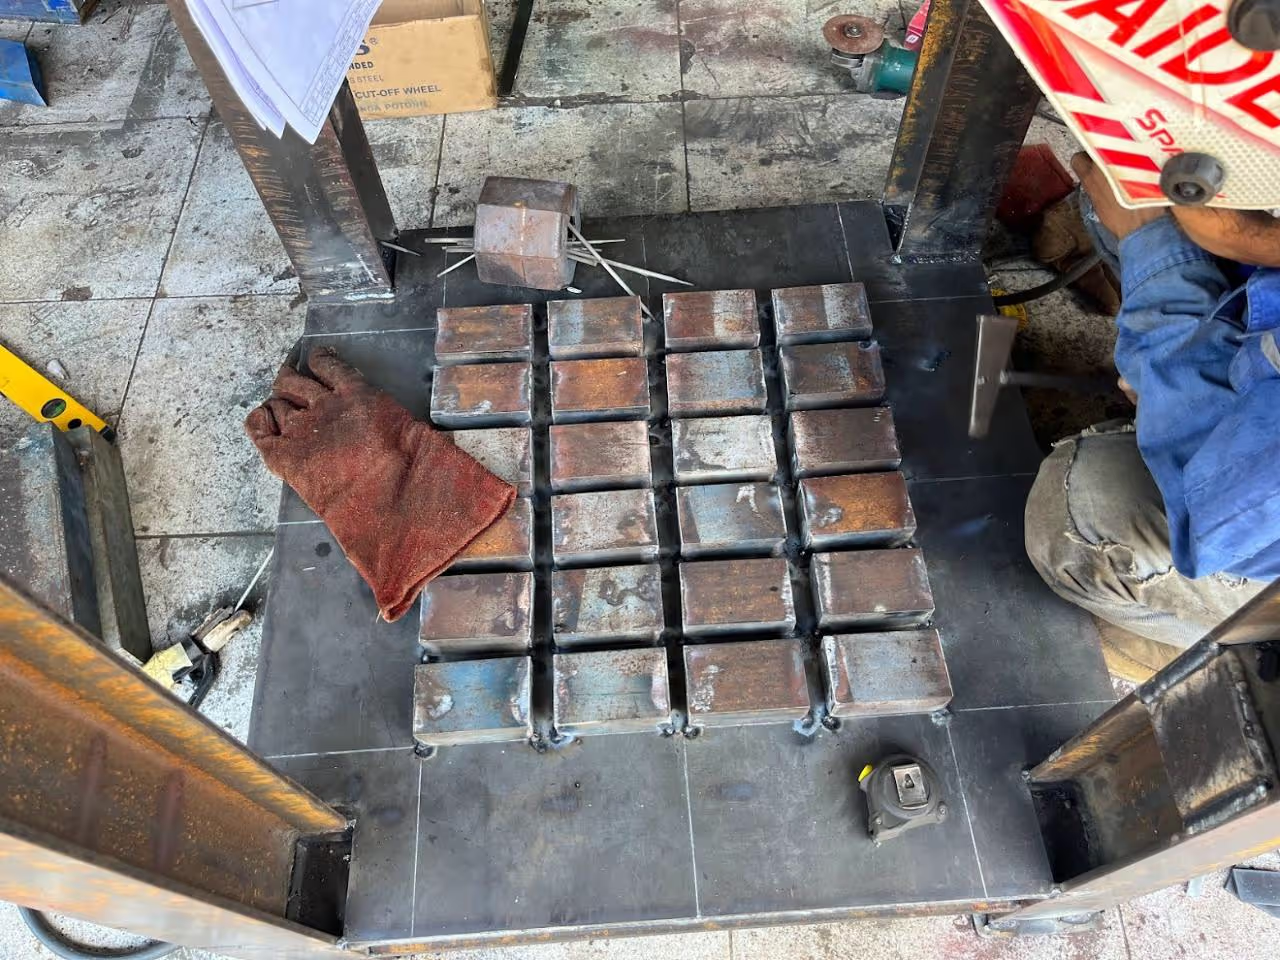
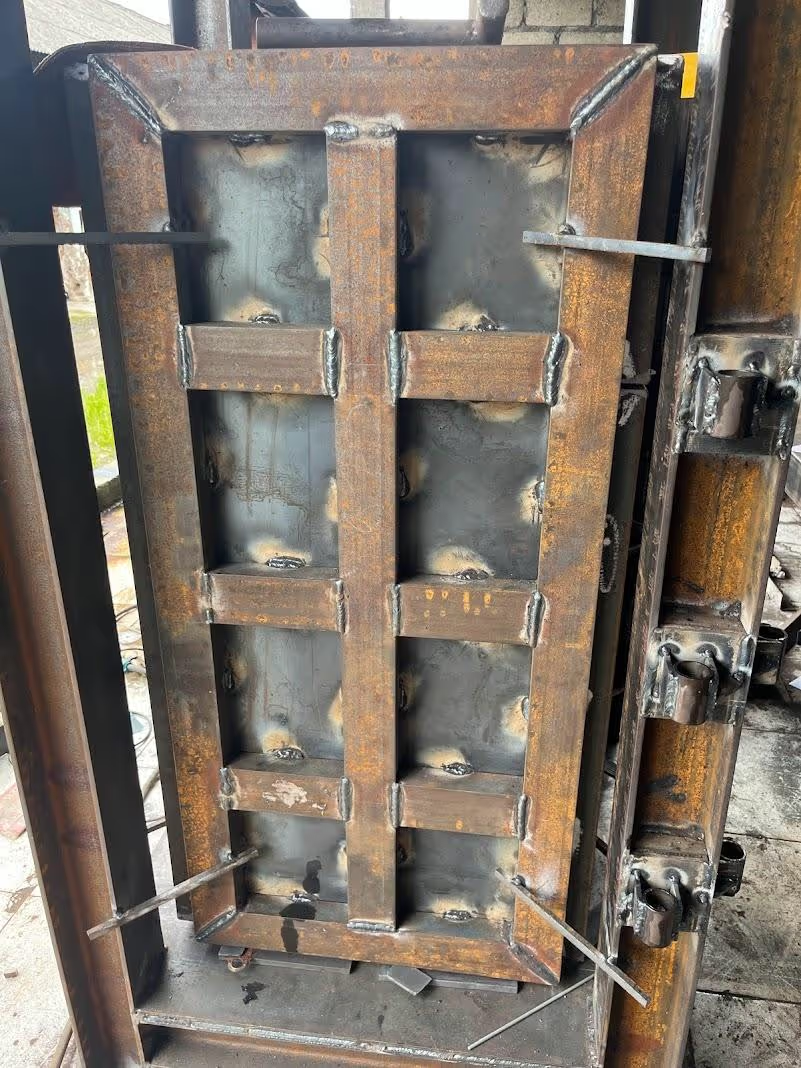
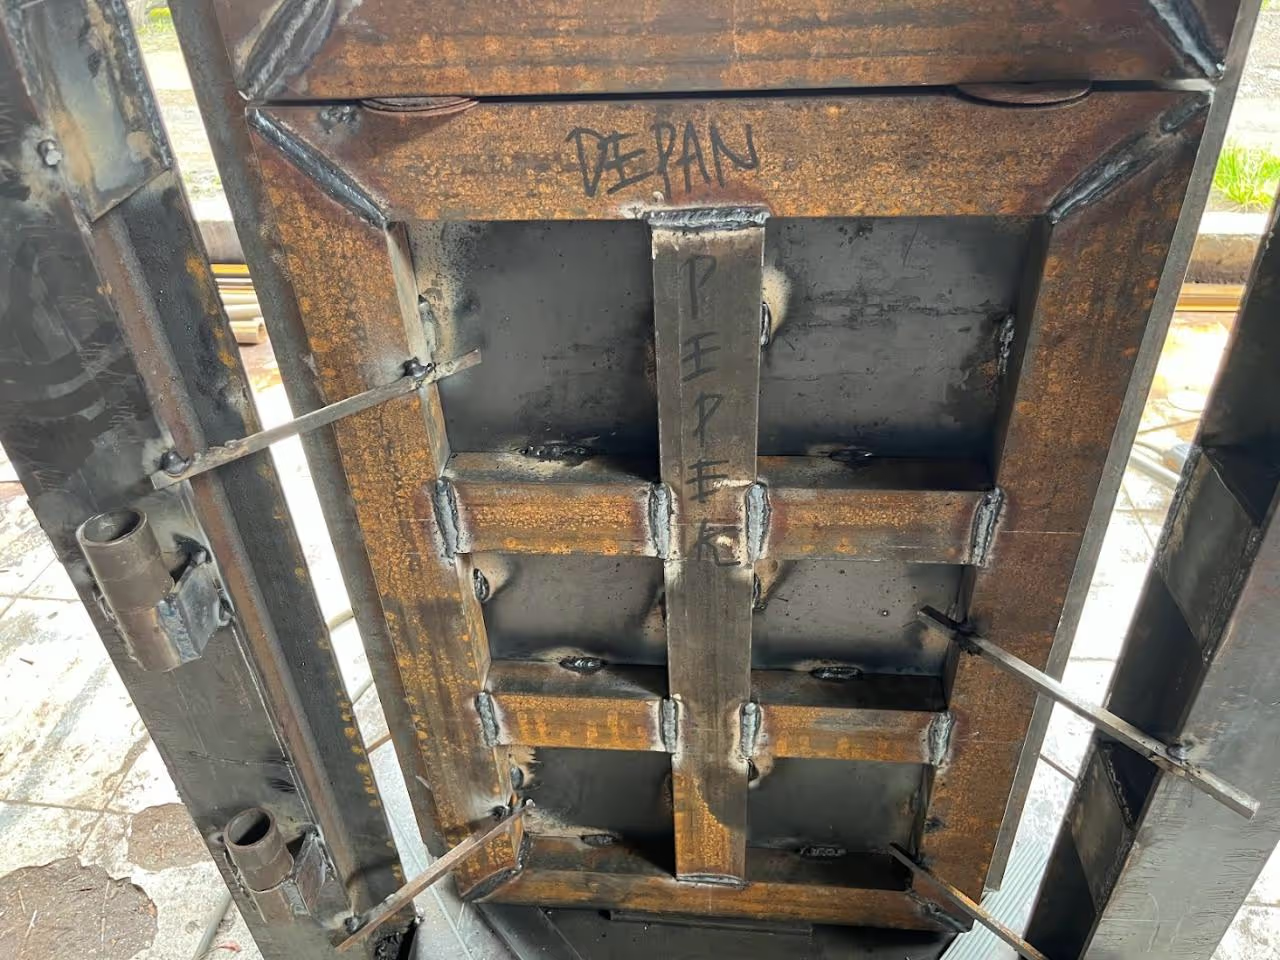
Cut and build the main frame according to the design for the base of the baler, you will need to build a 'platform' grid for the twine/string to go through this requires precision in welding to create both the individual 'grid' and to place it precisely on the bottom of the frame.
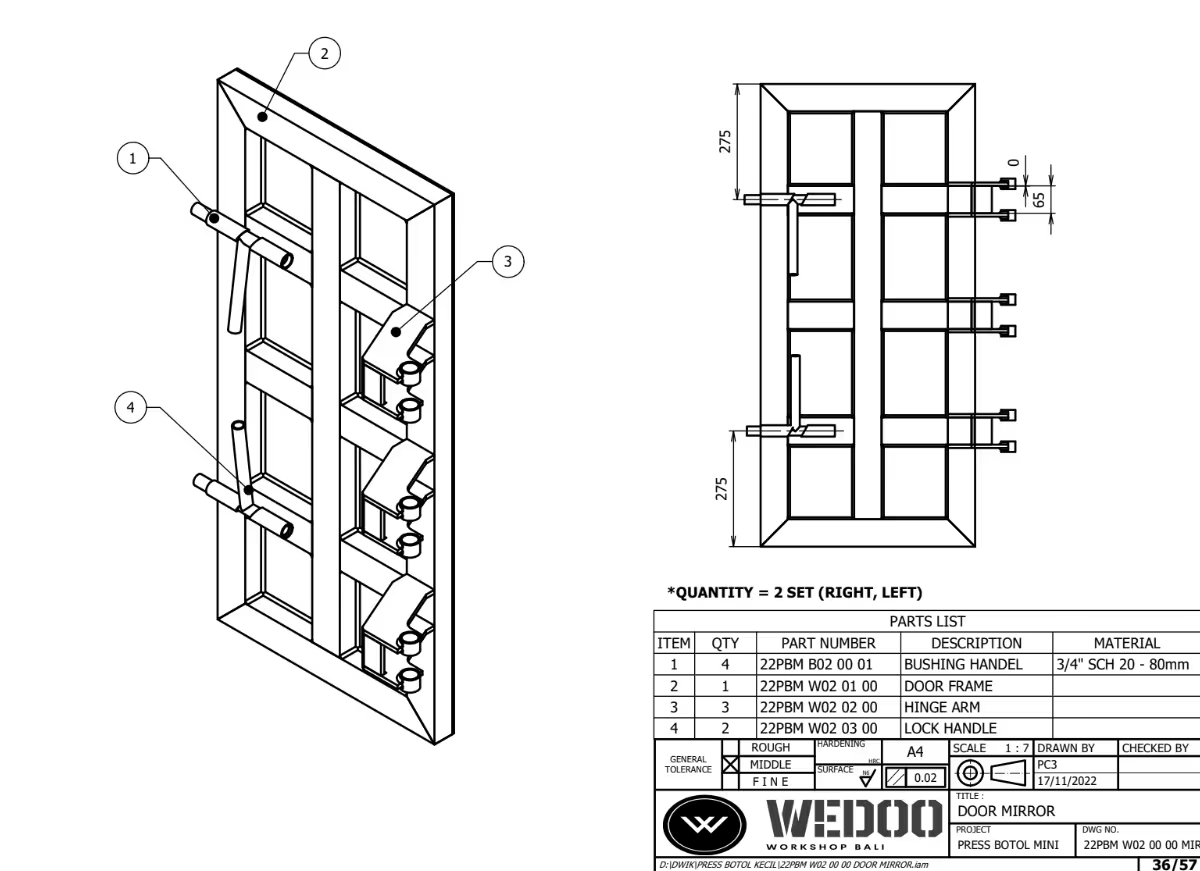
Hinge are consisted of two parts, the one that are fixed to the door and the one that are fixed to the frame. you can cut all the parts with the plasma cutter and weld the assembly together.
once hinges and locks are made, we recommend to attach the hinges on the main frame first (check step 7)
All four sides of the door have different placement of hinge and lock so make sure you follow the design properly.
We designed the front door with a fold down feature for more ergonomic access to load materials into the machine
If you are unsure about your ability to weld things precisely, we recommend you to not attach the hinge to the door before making sure all your components are aligned (see step 7)
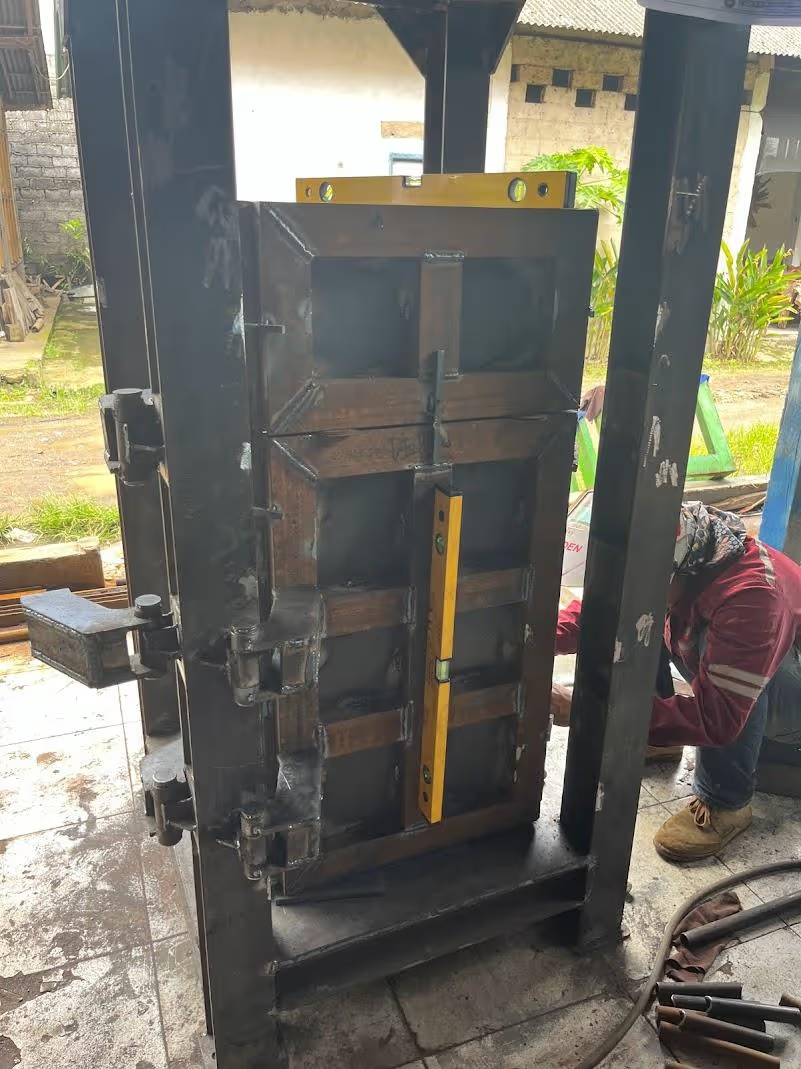
To make sure that your door are aligned properly, only weld your hinge to the door after you position the door in the right place. Following the hinge on the frame as a guide to make sure it moves smoothly
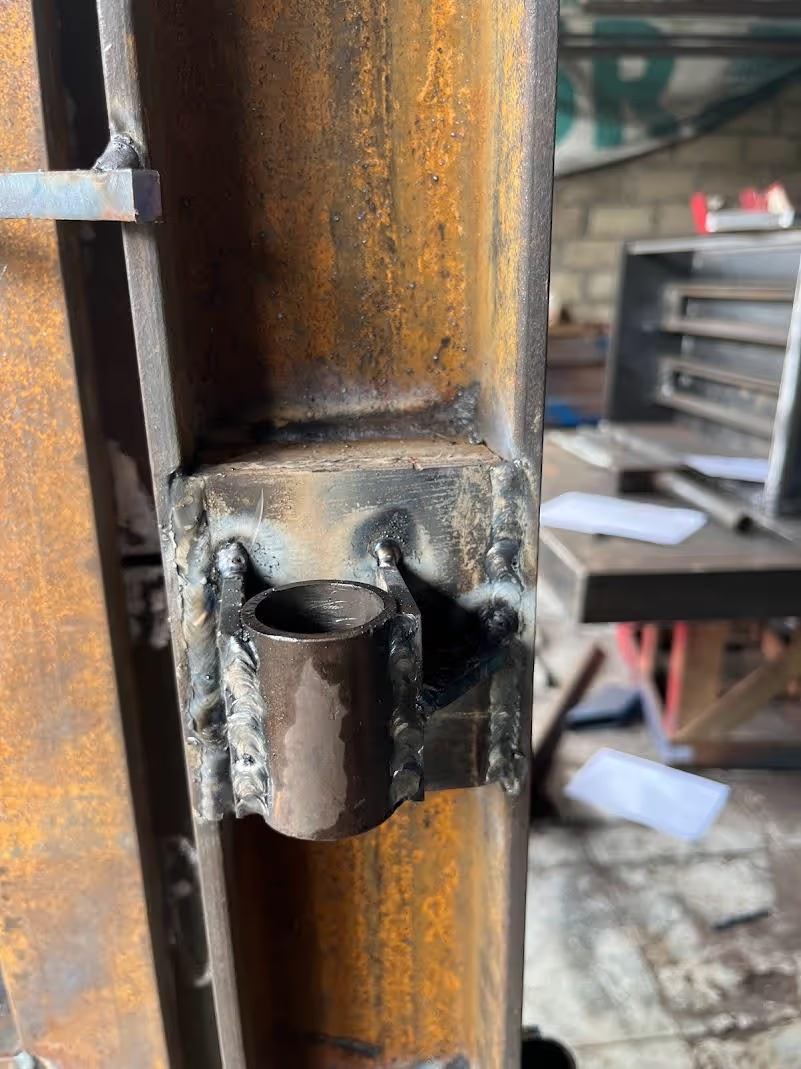
You can weld a temporary ‘staple’ like in the picture as a support or scaffold to aid the hinge alignment
weld the hinges to the door according to alignment with the frame then remove the temporary welded 'scaffold'
Make sure to remove excess materials from the welding process .When it is aligned properly, all the hinges and the locks should run smoothly. You should be able to open and close all the 4 doors smoothly
Build oil tank and case for the motor
Make sure there are no leaks in the seams
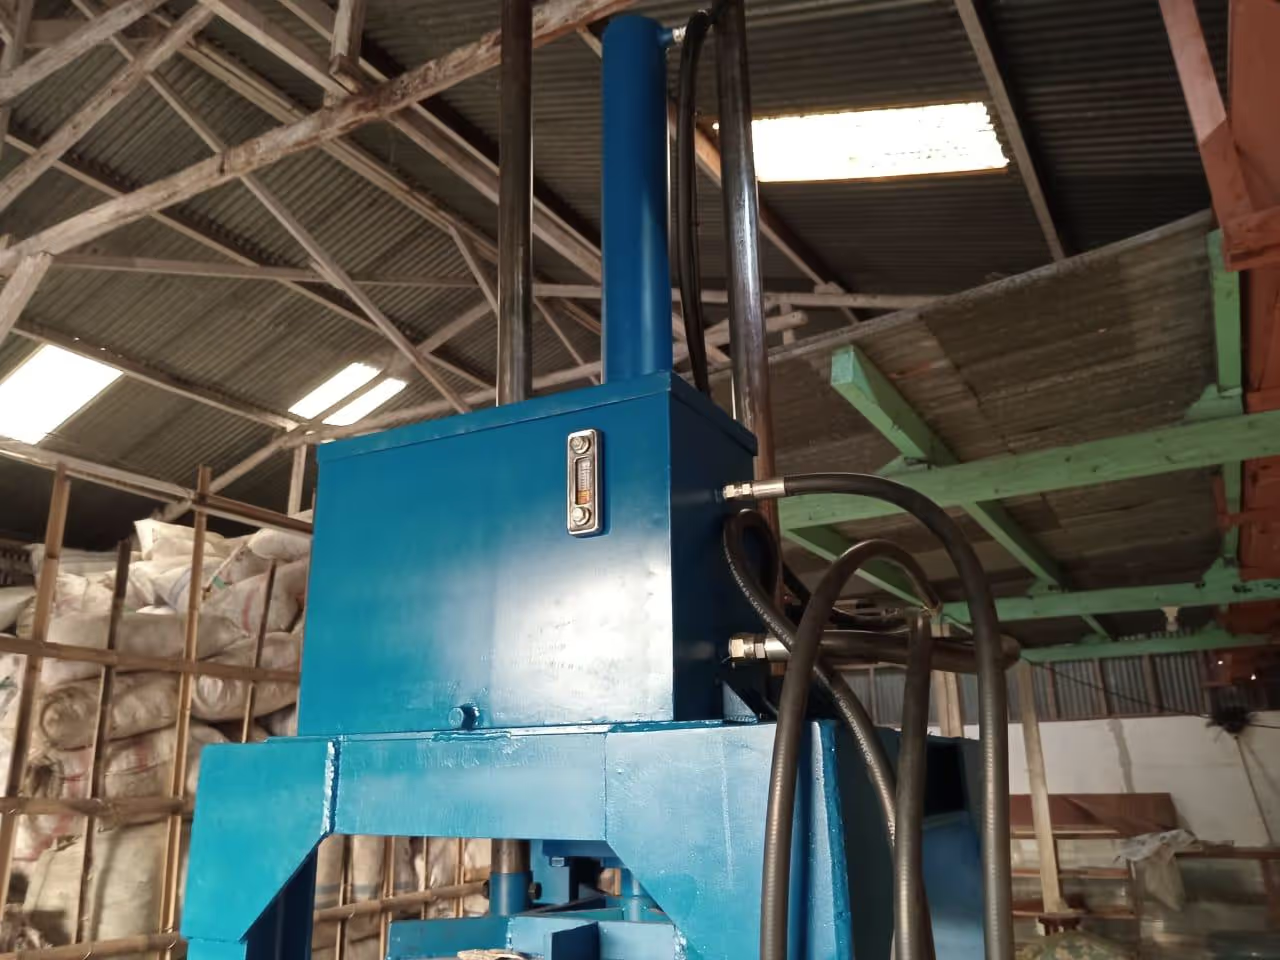
attach it to the top part of the baler according to the 3D drawing.
This needs a few people to do as the hydraulics are very heavy two strong persons needs to be at top as a receiver, two other lifting the hydraulic and one securing it from underneath.
lift the hydraulic up and secure it in position
Attach the remaining components:
Test your machine to make sure it works properly.
Once you are sure that all the parts are working well, disassemble all the component before painting the frame
We recommend placing your machine on a leveled floor and it's even better if you can screw the machine to the floor too for more stability.
We believe that open source technology is crucial for the development of sustainable solutions that can be shared and improved upon by a global community of makers, engineers, and designers. By making our design open source, we hope to encourage collaboration, innovation, and creativity.
We would love to hear your thoughts, feedback, and suggestions for the design and development of our open source automatic baler machine. Whether you are an experienced engineer or a curious maker, your input and ideas are invaluable to us. Please visit our [filtered] profile for our contact information
Let's work together to create a more sustainable future! Thank you, Wedoo team