UAO vertical manual injection machine

INJECTION
UAO vertical manual injection machine
INJECTION
Following the initial precious plastic models, I modeled in SolidWorks with most of the detail, a manual vertical desktop injection molding machine that does not require welding processes. Its injection capacity is approximately 90 grams and the voltage is 110Volts. Parts already were manufactured and machine was assembled. It also was tested and is working well. I am looking to improve the behavior of the temperature by using the PID technique to have a better temperature control. In the process of building the mold. In the file called Ensamblaje.SLDASM you can find the 3D model of the machine. There is also a file with some DXF files and Building drawings too.
Browse Files
Table of Contents
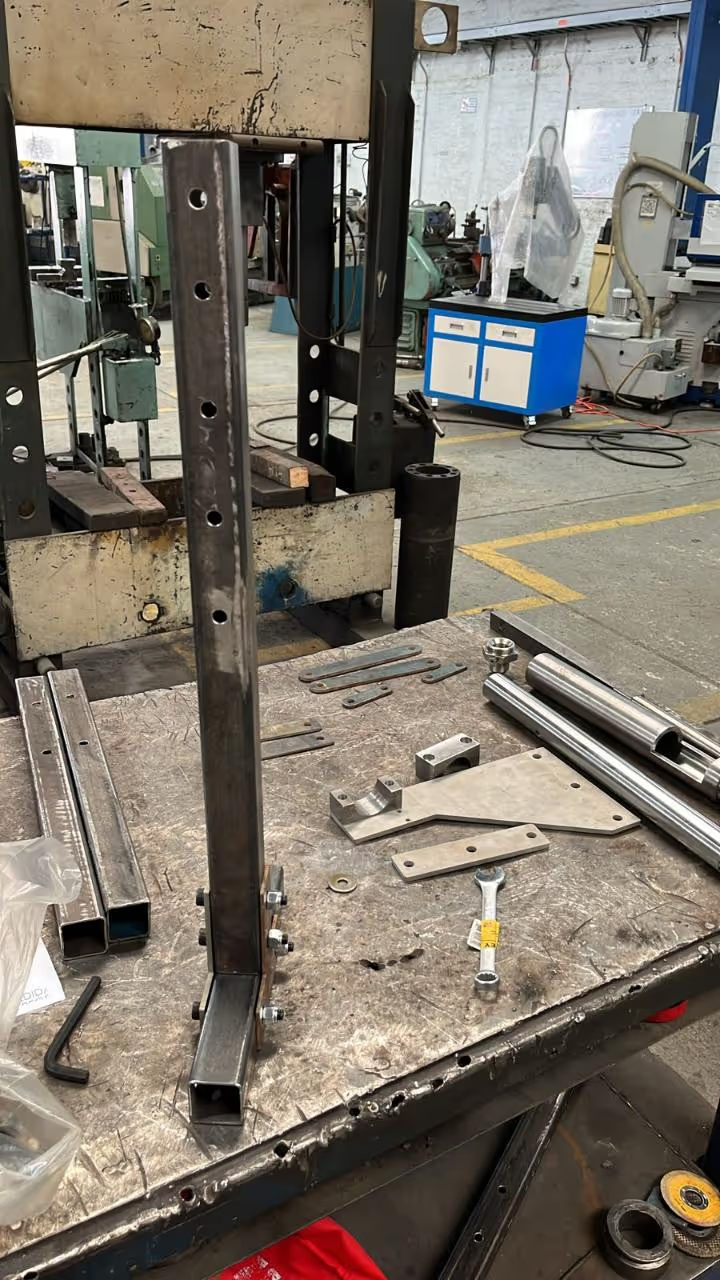
First at all, it is important to set all the parts required to start to assembly the injector machine. Some of the parts have been milled or cut with special tools like lathes or water pressure machine, however manufactured process has been very simple and drawings are provided with all detailed. There are 20 parts and 19 screws with washer and nuts. No welding is required. One 5/16" Allen key and
Base assembly requires 4 square tubes, 4 plates, 4 bended plates 90 degrees. 10 screws with nut 3/8". Allen key an wrench. First, its important to form an H shape with the tubes, then guide the screws through the holes. Tight up and done.
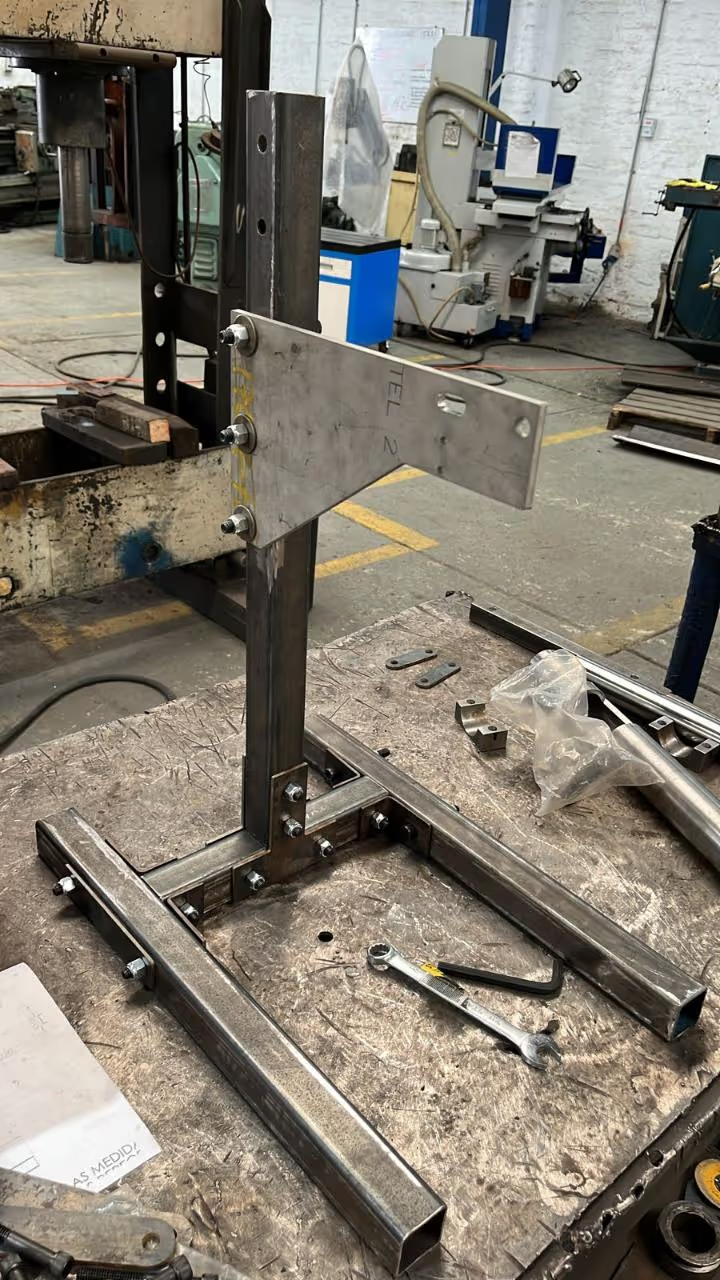
In the same way, use screws and nuts to set up the triangle plate which holds the clamps and thus, the holds the barrel. Every part and perforation is made for 3/8 inches screw.
Long linkage mechanism. Here use the two longest links and install them with the help of two 2 x 3/5" Allen screws, double washer and nuts. Do not tight too much because this is a movable part.
Finally, Shaft for injection purpose and handler need to be installed. First insert the shaft into the barrel. It can be held with a screw. Make sure the nozzle is installed too. Then, screw the handler bar to the mechanical link and use the short mechanical link to held the shaft. As mention before, use 3/8 Allen screw an Allen key for all the assembly process.
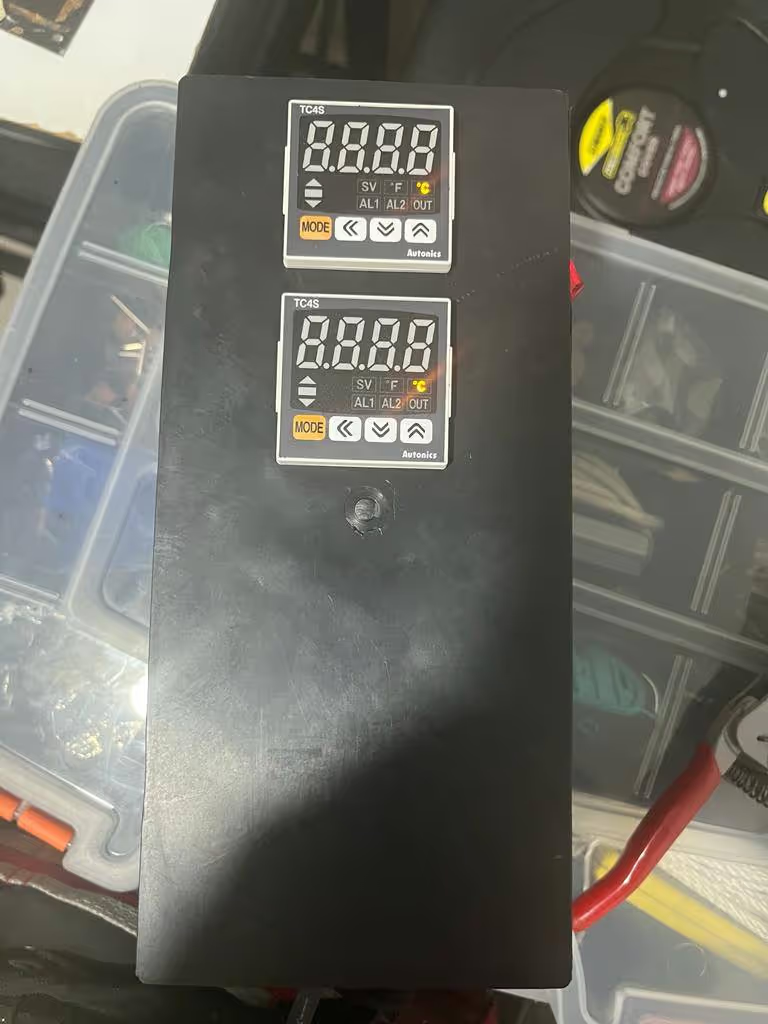
Install two temperature controls, two solid state relays, one current differential protection, one switch and two resistors. Because I wanted to have a large quantity of material to inject, I mean to be able to work with 100 grams of material, resistors have a capacity of 550 watts at 120 volts. There were used solid state relays also a differential current protection C10. Wires AWG gauge 18 and 14 for power. Two temperature controllers Autonics brand were used for PID temperature assistance.
The tutorial outlines a manual vertical desktop injection molding machine design and assembly process. Below is the extracted list of required tools, software, and hardware:
The design avoids welding and prioritizes screw-based assembly, with 19 fasteners and 20 custom-machined parts[1]. DXF files and fabrication drawings are referenced for component manufacturing[1].