Build easy-to-wash chicken coop from bottle caps

PRODUCT
HDPE
SHEETPRESS
Build easy-to-wash chicken coop from bottle caps
PRODUCT
HDPE
SHEETPRESS
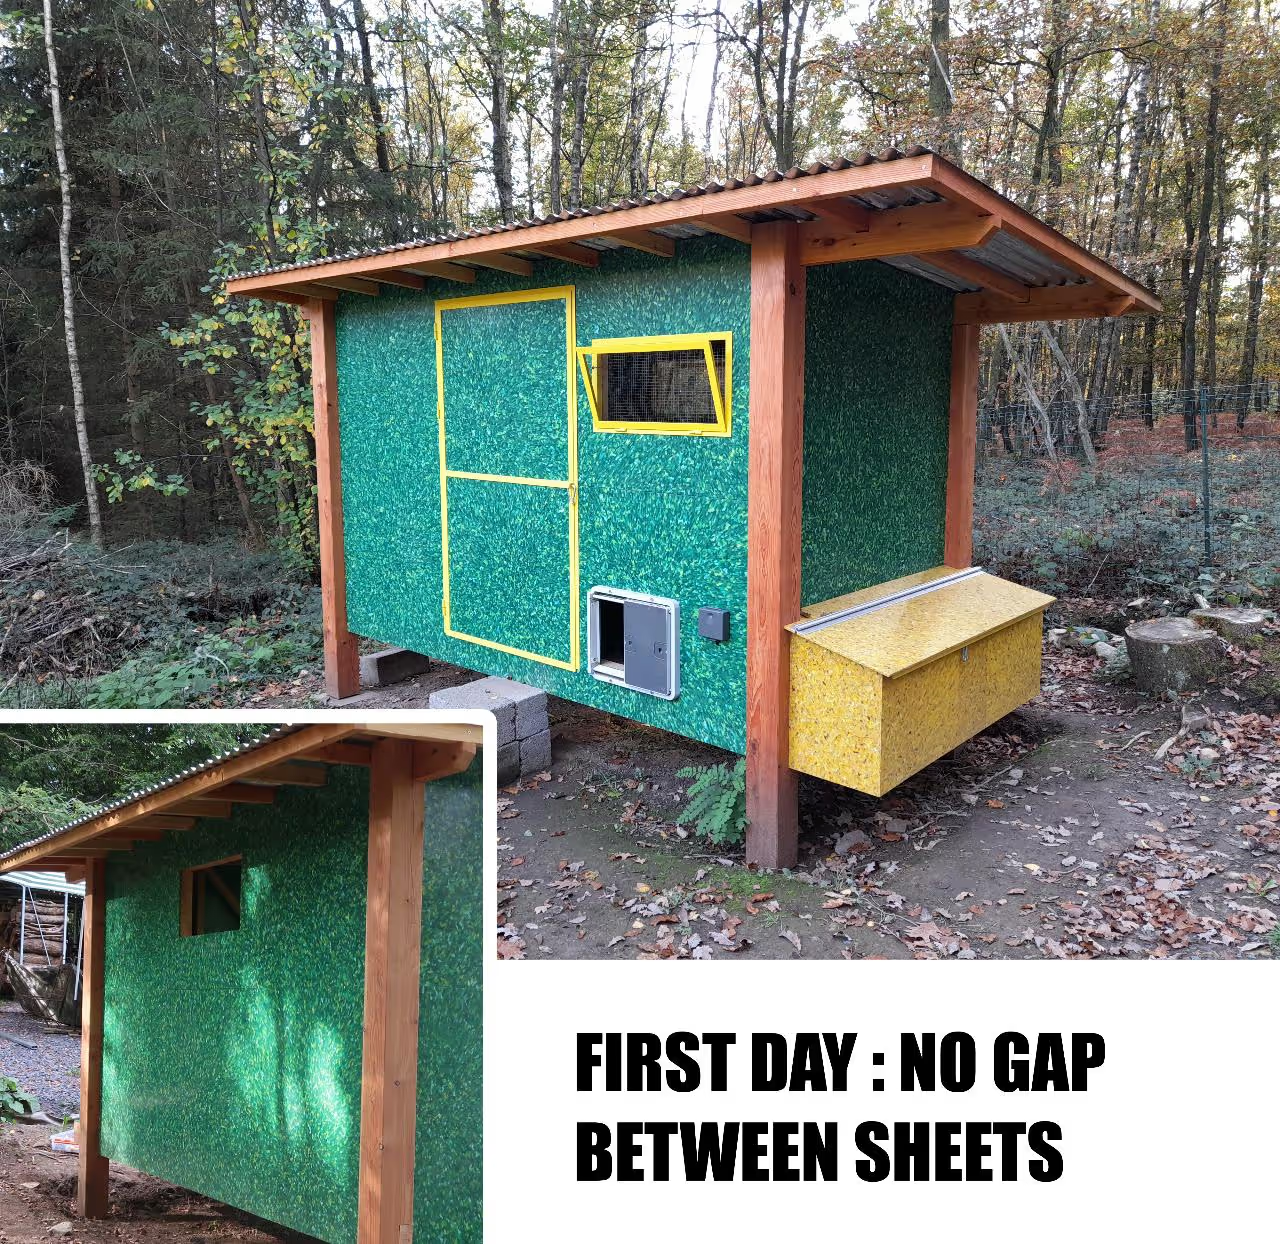
Recycled plastic sheets are an excellent choice for creating chicken coops, as they are easy to clean and less likely to harbor parasites such as poultry red mites. Let me tell you how we built ours! You can download the plans we've made, watch the various stages in the Youtube video, and of course subscribe to my channel to find out about future projects!
Browse Files
Table of Contents
Watch that amazing Youtube video first !
Download the files provided above
Collect around 120 000 bottle caps
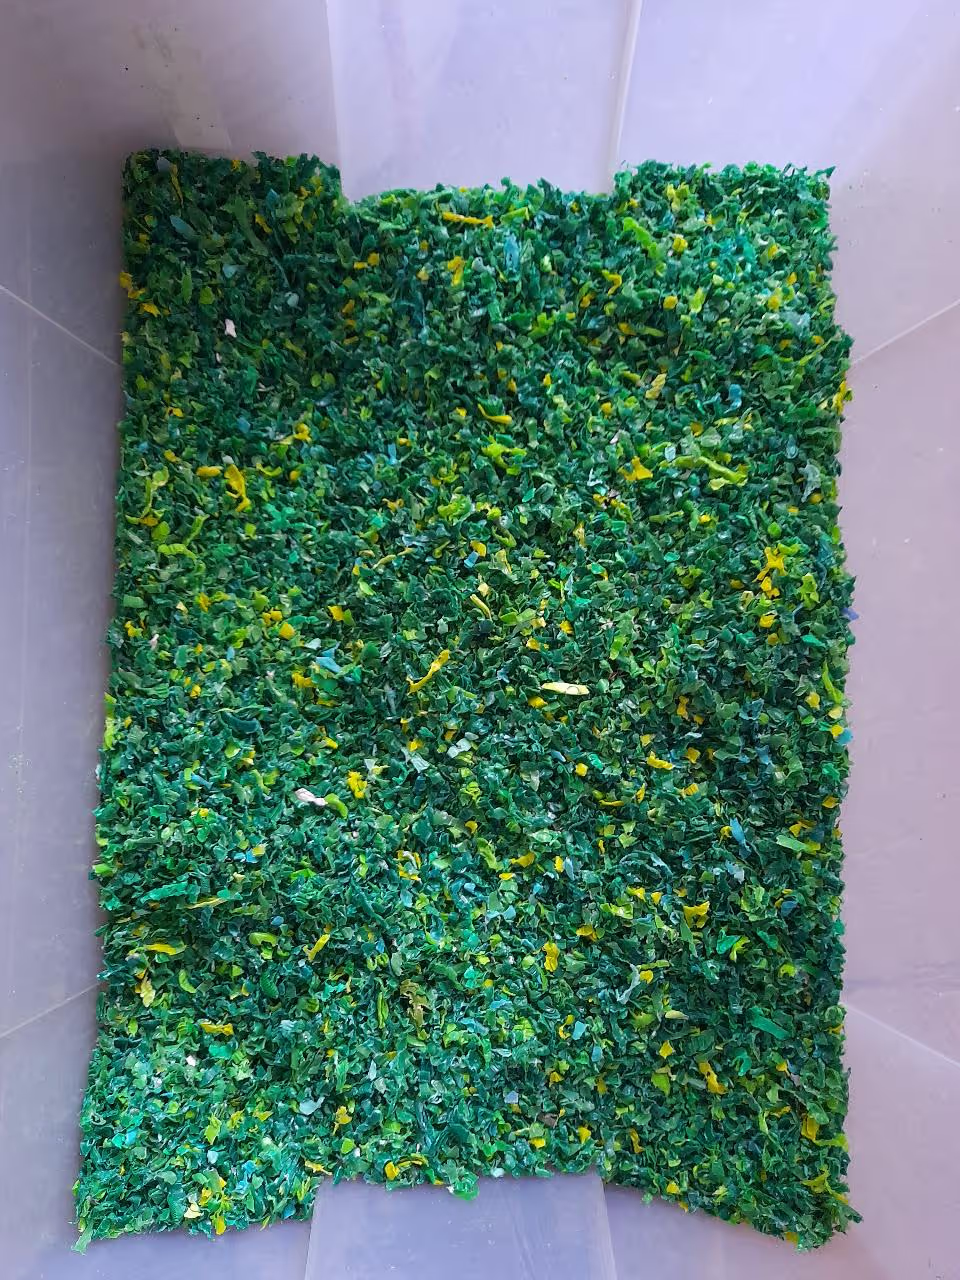
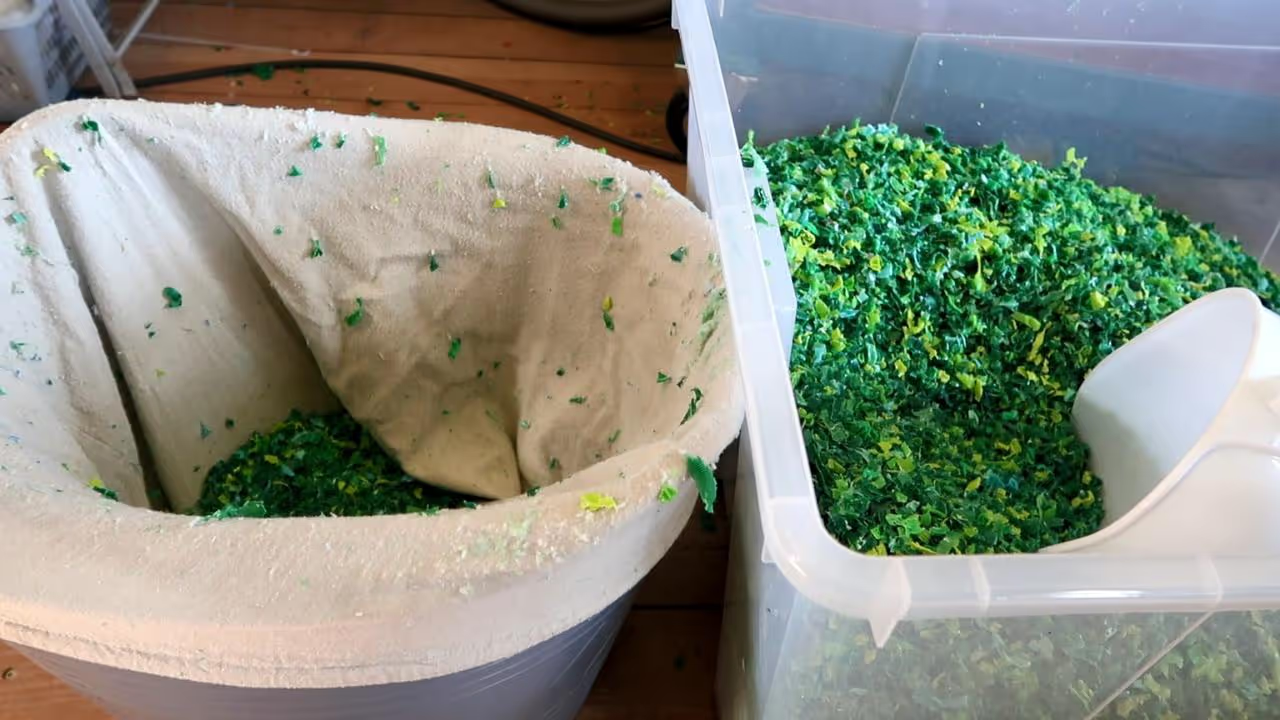
Shred & wash your bottle caps
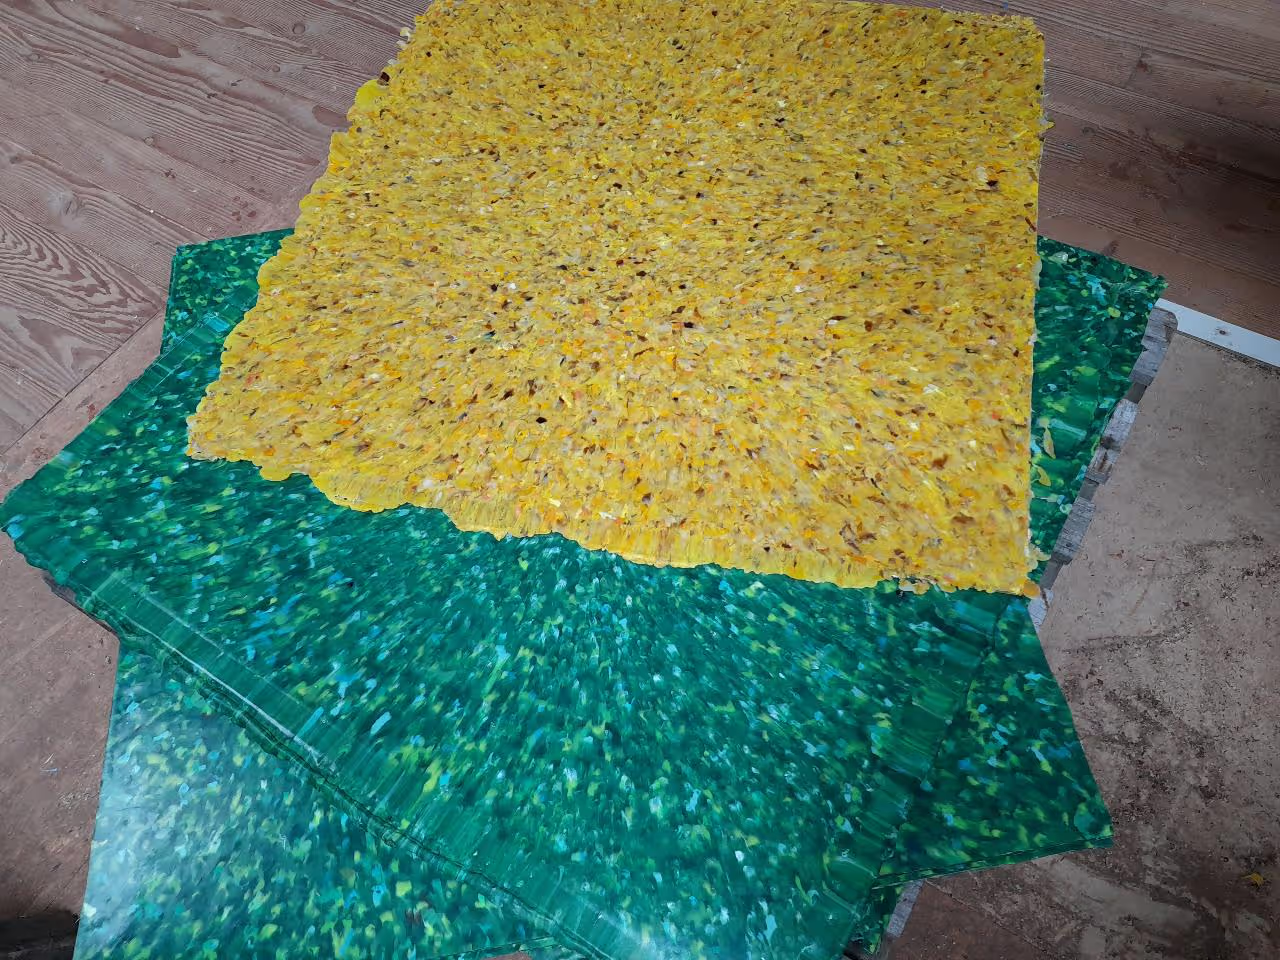
Create your sheets using the sheetpress
Build the wooden structure and the roof
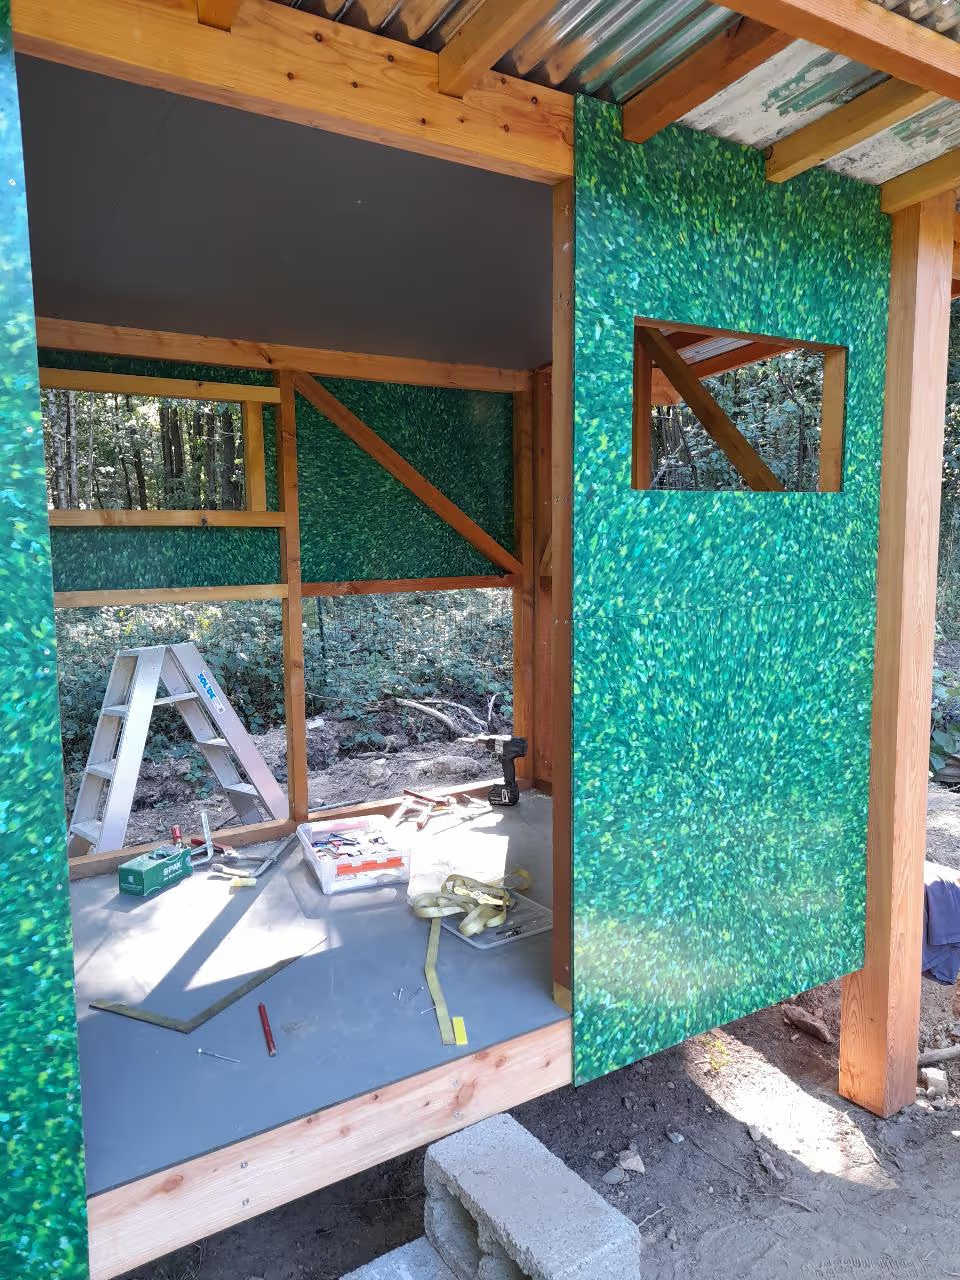
Cut and add your recycled plastic sheets
Allow space between your panels !
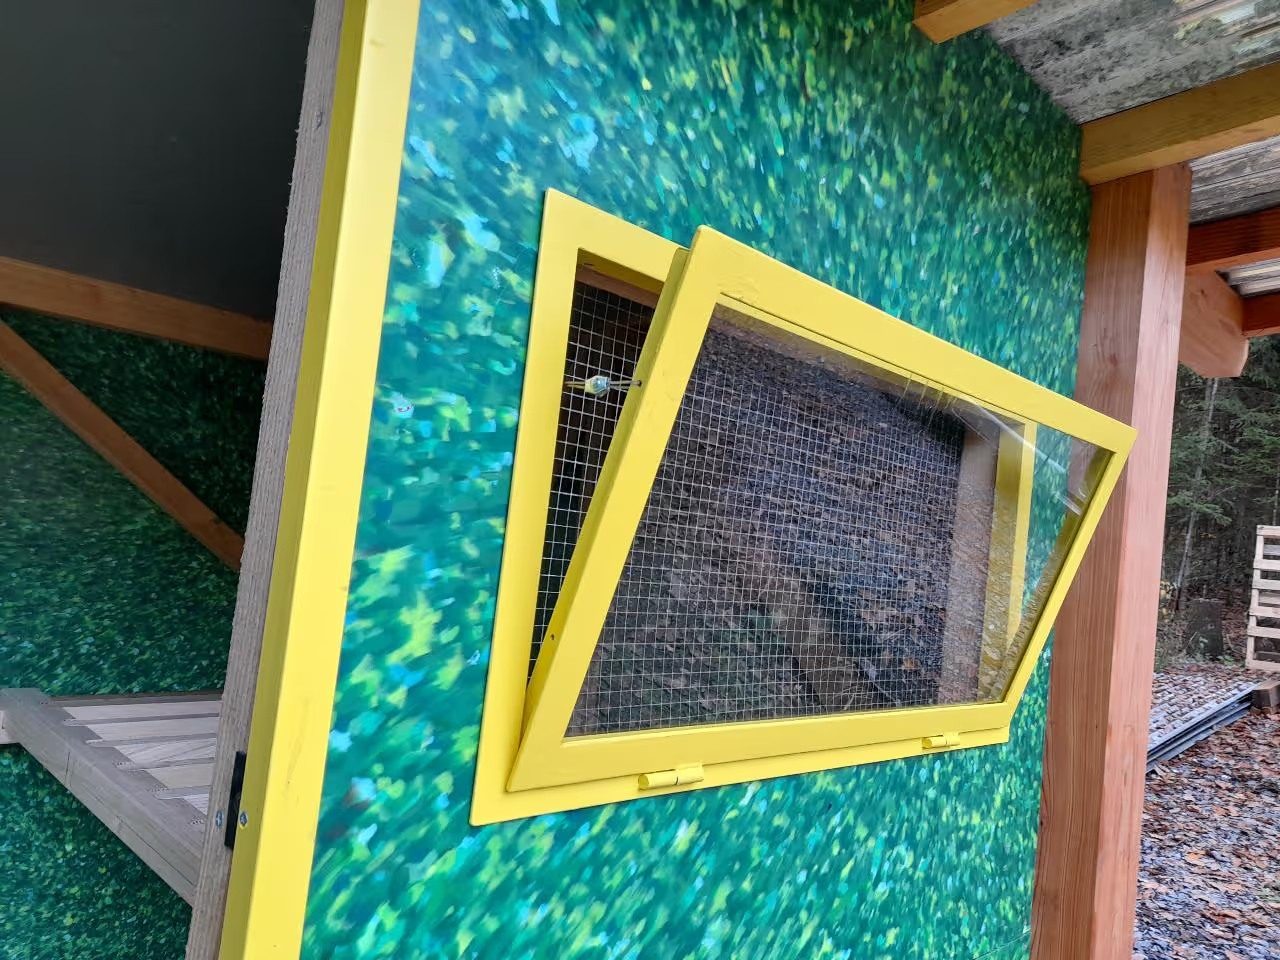
Create your doors and windows
Now, the nests !
Add the last elements
Time to celebrate !
In this video, I show you all the production stages of this chicken coop made from recycled plastic sheets. Watching the video first will give you a complete overview of what we're going to make, and make the rest easier! Take this opportunity to subscribe to my channel if you like this type of content - your support helps me enormously!
In these files, you will find the plans of the henhouse as we built it, in .PDF but also .DXF format so that you can view and modify them with an opensource program such as LibreCAD. The wooden structure was designed to be covered with 1001001cm panels made with the most widely used version of the [filtered] sheetpress.
Collecting such a large quantity of caps can be a real challenge, so I'm going to tell you how I do it personally. I work with an association that collects the caps from schools, stores, public places, etc. before sorting them by color. I pay for this collection and sorting service, as it saves me dozens of hours of work!
Try to find such associations in your neighborhood! In our area, many collect bottle caps and sell them to recycling companies to finance humanitarian activities: dogs for the blind, wheelchairs for the disabled, etc...
For this project, we needed 240 kilos of bottle caps.
SHREDDING
I use a V4 pro shredder to shred the caps 4 times, until I get the right size of shred for my needs.
WASHING (and DRYING)
I find that washing is more effective when done after grinding, rather than before. So I put my shredded plastic in heavy-duty cotton canvas bags, which I seal carefully with reusable zip-ties. I then wash them in domestic washing machines, with a filtration and water recovery system. Filtration prevents the loss of microplastics into the environment, while water recovery enables the washing machines to operate in a closed cycle, reusing the same water many times over, for a multitude of washes, before being renewed.
I then dry the bags of shredded material in tumble dryers (powered by solar panels) to obtain perfectly dry, moisture-free shredded material.
Using the method explained in a previous "How-To" ( ), you should be able to make between 6 and 8 sheets per day.
For this project, we needed 24 panels, including 4 yellow ones for the nesting box.
So you could be finished after 3-4 intense days, good job!
(Don't mind the pink ones, they were for another project in our daughter's room!)
Build the wooden structure following the plans provided in this “How-To”.
Of course, you will have to adapt to your own location and your available materials.
In our case, we had Trespa panels in stock (from my partner's ordering error for a previous professional project) so we used them for the floor and ceiling. If you don't want to buy Trespa panels, you can adapt the structure and also use recycled plastic panels instead.
The roof of the henhouse was insulated and then covered with corrugated iron sheets.
As you will see in the plans, we wanted to provide a small storage space next to the chickens' living room in order to be able to store equipment there. It is accessed from the outside and not the inside of the henhouse.
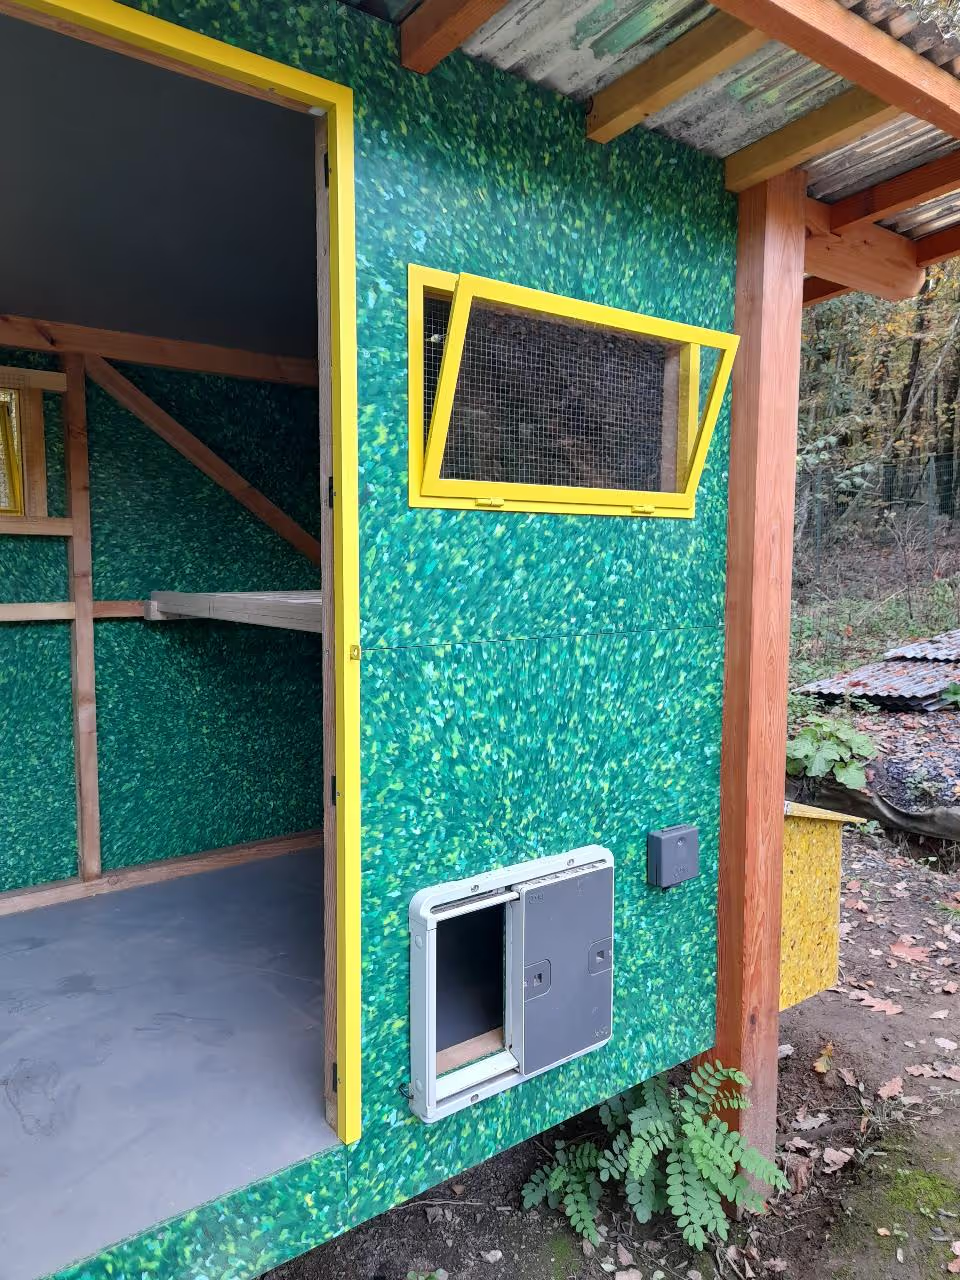
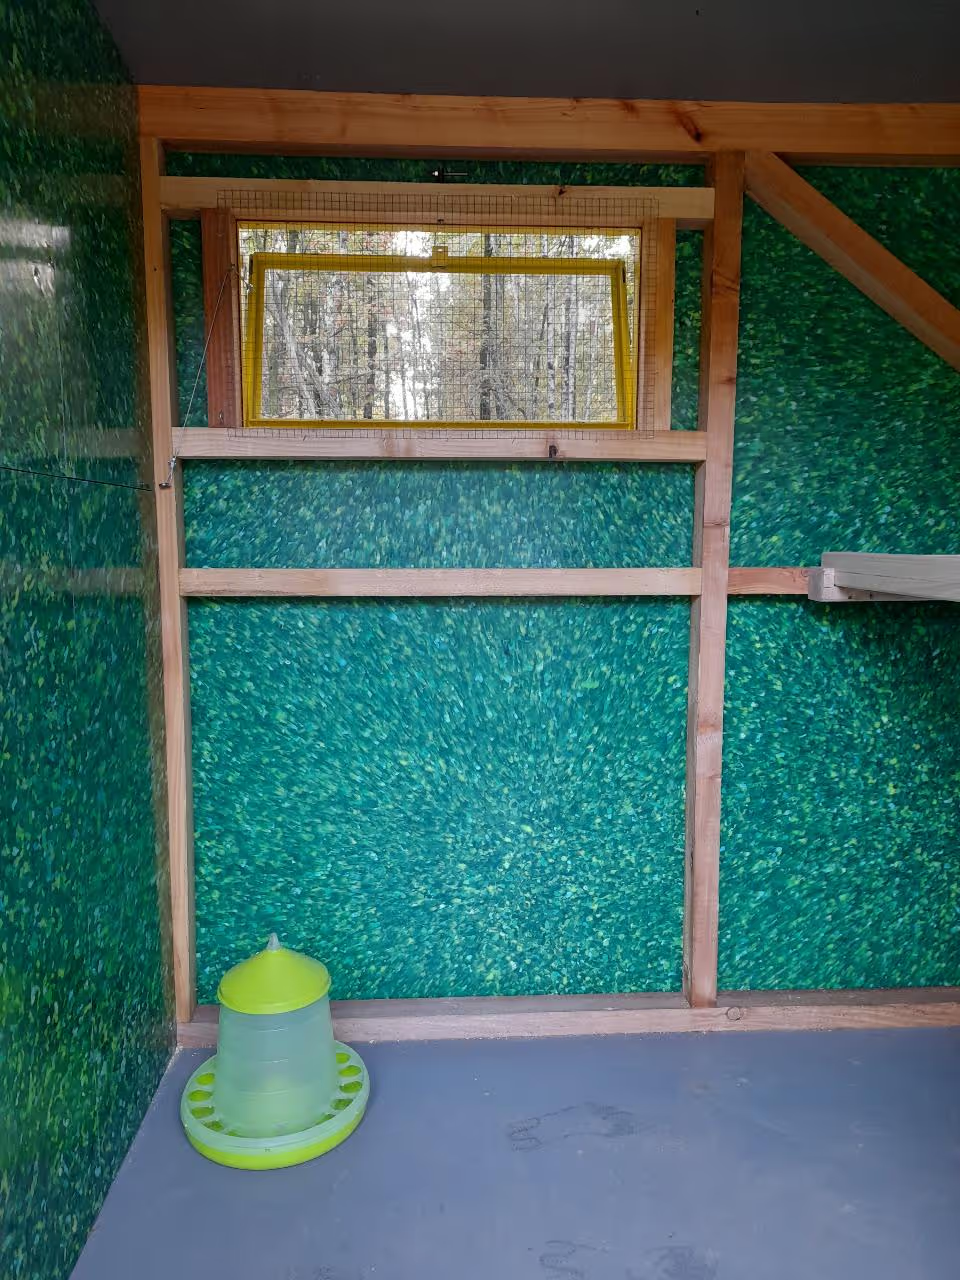
It's time to dress the interior and exterior walls of your chicken coop!
Be very careful when cutting your panels, do it in a place that allows you to collect/vacuum up all the plastic dust created by the cuts, so that this plastic does not end up in the environment. To attach the panels, you will need to pre-drill (recover any plastic waste that falls!) before screwing to the wooden structure.
We made the "mistake" of not providing space between the panels, which does not allow them to expand properly when it is very hot, and some panels can end up a little bulging.
To avoid this, it can be good to allow 0.5cm-1cm of space between the panels.
Depending on the season in which you build your henhouse, and the temperature differences that you may have in your country (between summer and winter), you could notice big changes in the expansion of your panels, this is normal, but you must anticipate them during construction!
Our doors and windows have a steel structure, which has been painted (with the family!). We first used putty to glue the panels to the steel structure, but it didn't work well. We therefore opted for a mechanical solution.
Personally, we decided to add a metal mesh to the windows to prevent the intrusion of martens or rats.
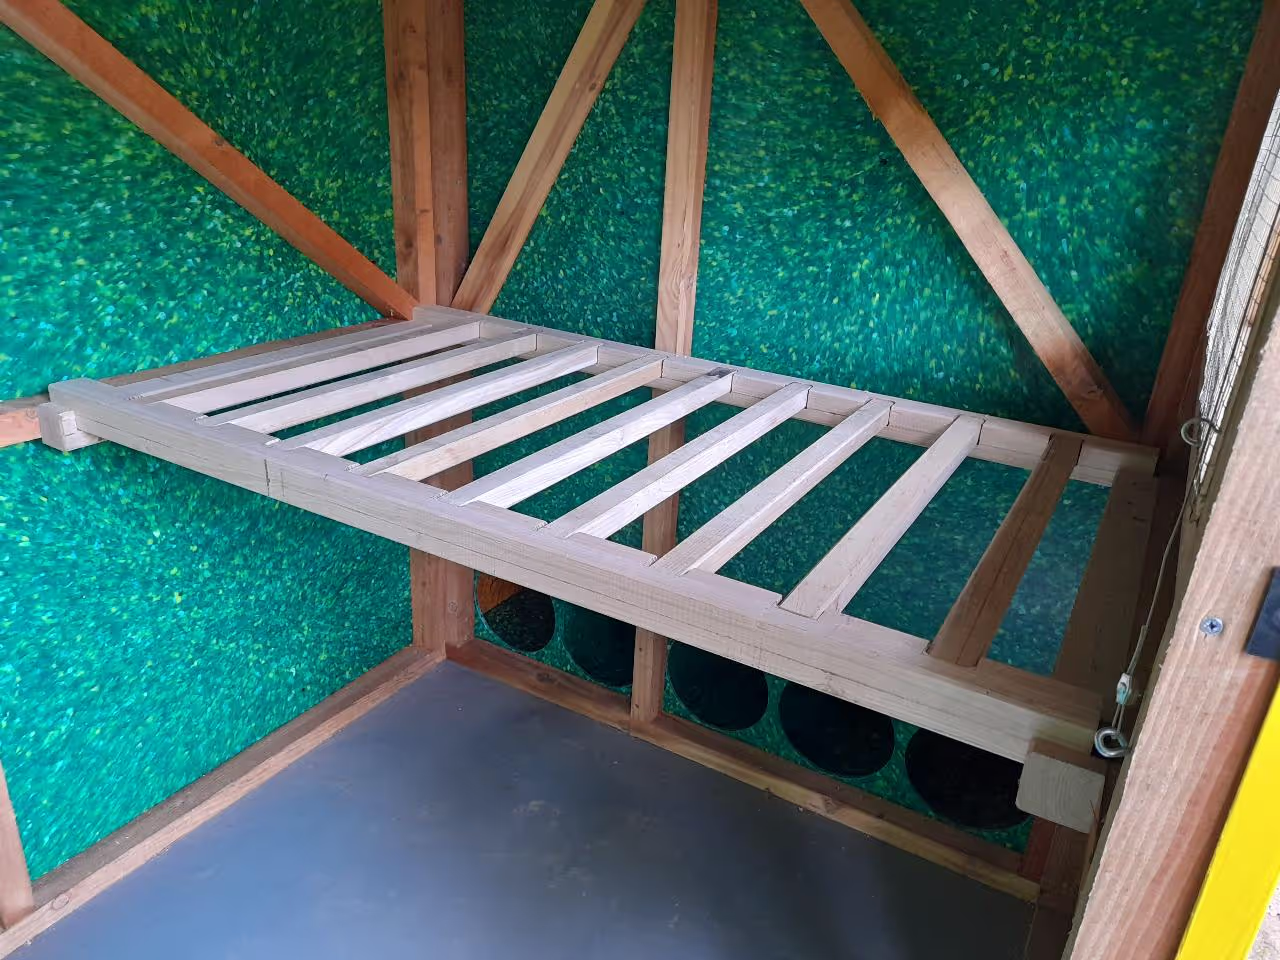
Then build your nests, always using the plans and adapting them to your needs. Be creative and don't be afraid to go for a different color!
If this is not yet done, add the interior perch, the automatic door for the chickens (we chose an Omlet brand door, which we bought second-hand). Again, adapt to what you find or already have!
Invite some chicks and have an eggs-traordinary party! Please send me pictures of your creation if you decide to build a chicken coop similar to ours !